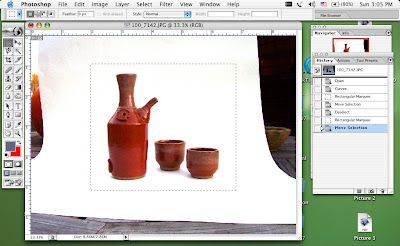
My set up is very basic. I have an inexpensive Kodak EasyShare camera and a piece of white poster board. I shoot my product shots outdoors at dawn, when the sky is bright but the sun is not yet casting shadows. As seen in the first screen shot, I just prop my poster board up (in this case against a dead potted plant) and set my pieces on it.
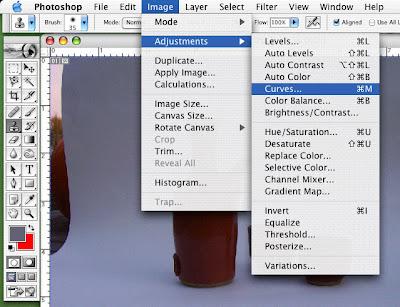
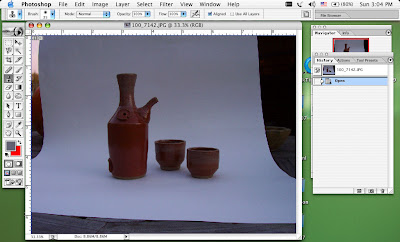 Once my photo is imported, my first step is to go under Image > Adjustments and select Curves. If your version of Photoshop does not have curves, you can do the same adjustments by choosing Levels and continue following along.
 I little box will pop up. just under the Options button there are three boxes with what look like droppers in them. Click on the white dropper. We are going to set the white point. We are going to click on the darkest area of the picture that should be white.
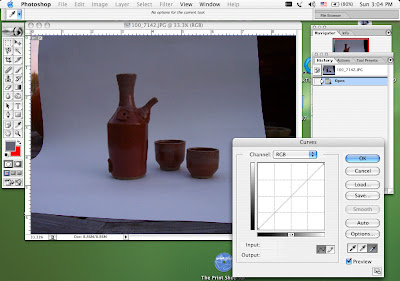 In this case, I clicked on a spot just above and to the left of the top of the sake bottle. For some reason, my cursor does not appear in the screen shot. Bummer.
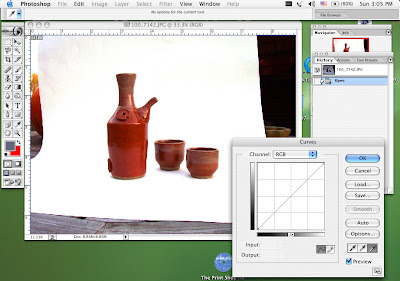 Now it is time to crop my photo. I know Etsy says to crop photos to square, but I do not. I believe most people view the site in gallery mode which is the default. Also, the front page and treasuries are seen in a gallery view, so I crop with those views in mind. In the tools menu on the left hand side of the page, I selected the upper left tool, which is the rectangular marquee tool. I simply click and drag my mouse to create the box shape I want.
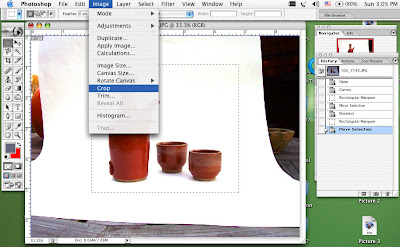
 Then under the Image menu, choose Crop.
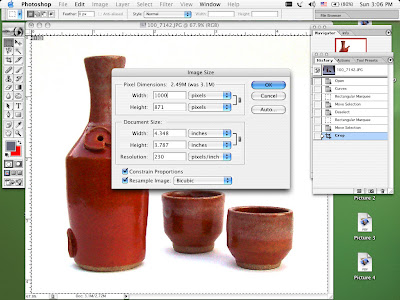
 Once the image is cropped, remember to go again under the Image menu and choose Image Size. Etsy requires out images to be under 1000 pixels wide, so I always set my width at the maximum of 1000 pixels. Click OK and save. You should have your product shot.
 Below is the image ready to list on Etsy: a fabulous Pumpkin Pie Sake Set glazed in a rich orange and then dipped in whipped cream white. It's perfect for getting you warm during those first autumn cold snaps.
12 comments:
great information, thanks for sharing!
Thanks for sharing your info! I will have to come back someday when I do have photoshop. In the meantime, thanks for telling me about Picassa. It's pretty cool!
Holy S*** - Thank you, thank you! I thought I was Photoshop savvy and I had never messed with curves before and it works like a charm. Great tutorial and easy to understand. I'm using Photoshop CS2 and it has curves and levels. Maybe I'll have to pull out my Photoshop for Dummies again.
Thank you so much! I never understood how curves worked before. I'm glad I saw you in the Etsy Labs today!
Love, love LOVE the tip about using the "Set White Point." Until now I was adjusting using the graph. This works like a charm! Thank you thank you thank you!
Thank you for this! It worked like a charm!
This is a really great tutorial! I use photoshop for my photos already, but I never knew how to use the curves tool correctly! I always adjusted the brightness & contrast, but the curves way is much quicker!
This is a really great etsy focused easy to use photoshop tutorial, well done :D
wow, thanks...so simple!
This is great! thank you so much :)
Holy Kripes! I've been using photoshop this entire time AND using the curves option but was still doing it wrong!!!! Thank you so much. Can't wait to try it out.
Geat tutorial--that will save me tons of time! Thanks!
GoTo
Thanks so much for the tips!
Post a Comment