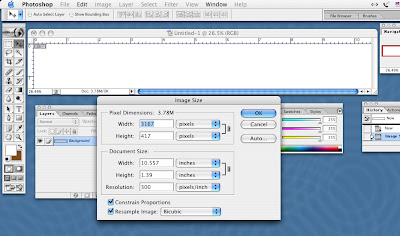
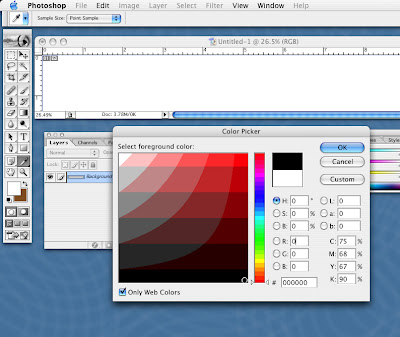
The next step is to decide on a background color. I am going to choose black. I click the foreground color box and then select the color from the color picker. I have selected web only colors. I can change that later if I want to alter a color slightly. I then go under the Edit menu and choose "Fill" and fill with the foreground color.
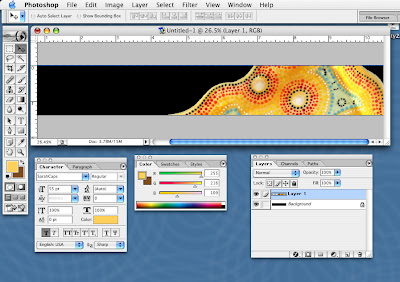
Now it is time to paste in my images. First, I need to be sure to put them in 300dpi as well. I then change the image size to get them in scale with the banner. For instance, the photo of the platter I chose to use was 18 inches high. Since I only wanted the rim, I cropped the photo and reduced it to only 4 inches high. Finally, I just selected the photo, and chose copy under the Edit menu, and then pasted into my banner. In Photoshop, the photo and background are now in separate layers and independently manipulatable. I want this platter to sit off kilter, so I rotate it using the Transform option under the Edit menu.
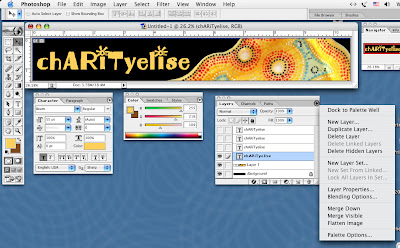
Now it is time for text. Choose the text tool and click on the banner where you want your cursor to appear. I usually start in the center of my text area. Choosing the font is the most time consuming part for me. Notice the text is in its own layer. This is helpful because I can create multiple layers of text and turn them on and off, allowing me to try out a number of fonts without losing the previous ones. I turn the layers off and on by clicking the eye that is next to the layer. If the eye is beside the layer, that layer is visible. Note: I chose a photo with a black background and made sure is was a true black like the banner background for seamless pasting.


Once I settle on a font and everything is perfect, it is time to flatten the image. Once you flatten the image, the layers are fused and editing becomes horrid so save a working copy before flattening. Click the little triangle icon on your Layers window and choose Flatten Image. This will merge all the layers into your background leaving only one layer. If you have invisible layers, Photoshop will ask if it is okay to discard them; the answer is yes.
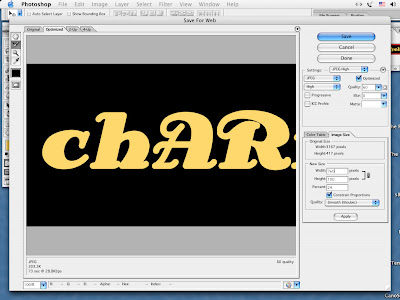
Now under the file menu choose Save for Web. In the window that opens, in the Image section, now change your banner to 760x100 pixels. It will save your banner in a jpeg format perfect for the web and to Etsy's size specifications. Ta da! You are ready to upload to Etsy!
 As a final aside, there are a hundred ways to get from point A to point B with Photoshop. This is by no means the only way and certainly not the correct way to make a banner. It is just the way that works for me. Have fun!
14 comments:
Nice tutorial, Lisa. :)
Why would I really need to flatten the image? If it do flatten it, can I "unflatten" it to make changes if it doesn't look good once it's in my shop?
You have to flatten your image to save it as a jpeg. If you want to save a working copy, then save it first with a name like MyBannerWorkingCopy.psd. Then you can Save for Web with a different name. You'll have one flattened and one you can make changes to.
thanks for the tutorial and the explanation on flattening...I've never been able to understand that!
I love photoshop. Great tutorial!
Thanks a million for such a great tutorial! I love my new banner!
I could use just alittle help....When I open my PhotoShop it does not look the same as in the tutorial and I cant seem to change or add anything. Do I open PhotoShop and then click on New in the File menu? Or what should I be doing? THanks for help! Tammy
Tammy@MemoriesOnMaterial.com
Thanks for the tutorial! No matter what I do though, my images look blurred in Etsy. Here is my shop URL:
beachbunny.etsy.com
Bah why does the font look blurry still?
Thanks! I am still working on my banner. Can't seem to get the font to be clear.
thank you so much for the help! I am very excited with the results... thank you thank you!!
Padgett Hoke
www.padgetthoke.com
www.padgetthoke.etsy.com
Thanks for the tutorial. I've finally been able to create an etsy banner the right size!
this is great! thanks sooo much!
Thank you! I never would have figured this out!
I used www.etsybannergenerator.com It's great online tool!! And you have possibility to order a custom banner.
Post a Comment